Guide to Use Dotted Line Animation
Compared with the exiting animation effect, the dotted line animation of SVG image and shapes are focusing on the movement between points and lines. With the help of dotted line animation, the SVG image and shapes can show in a creative and attractive way with ease.
Check the dotted line animation effect:

How to use?
At present, the dotted line animation can only be applied to SVG image and shapes. By the way the Enter, Emphasis, Exit and Dotted Line animation of elements can be played at the same time.
1 two ways to add doted line animation:
(1) Select the SVG image or shape on the canvas, move to the attribution panel and fine [Dotted Line Animation], then select [Add Dotted Line].
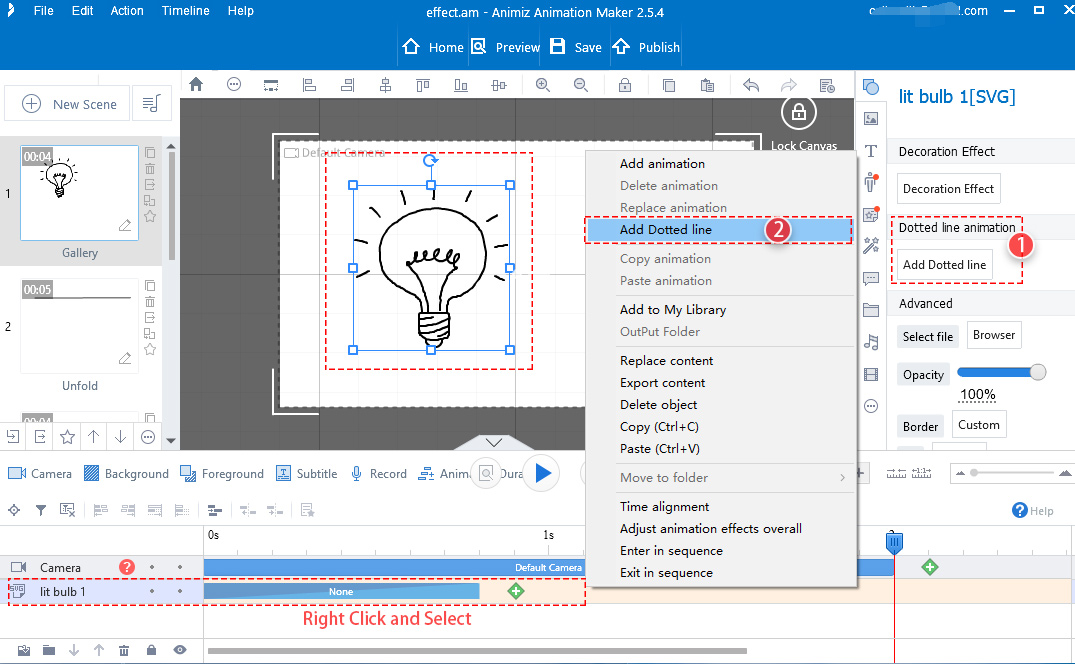
(2) The easier way is to select image or shape in the timeline and then right mouse click, find and select [Add Dotted Line], then the dotted line animation will be added.
2 Using and Customizing Dotted Line Animation
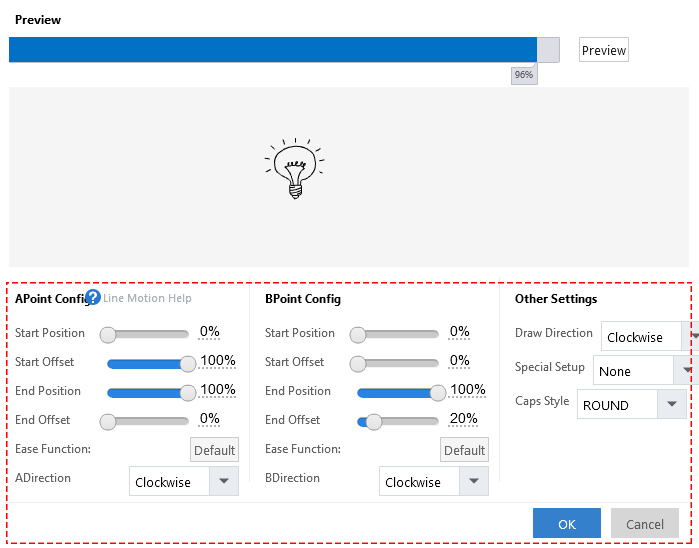
A is start point and B is end point for SVG image and shapes. You can custom the dotted line animation effect by changing start position, start offset, end position, end offset, ease function and direction of A and B point.
A/B Point Configuration:
Here we will take the line for example. A is start and B is end of the line.

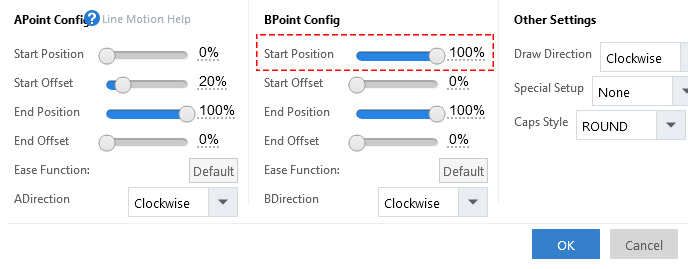
(1) Start Position: means the start position of A and B point. 0% means the start position and 100% means the end position during the line motion effect. Now let’s check the difference when start position is 0% and 100% (when other parameters are consistent).

A Point Start Position: 0% vs 100%
B Point Start Position: 0% vs 100%
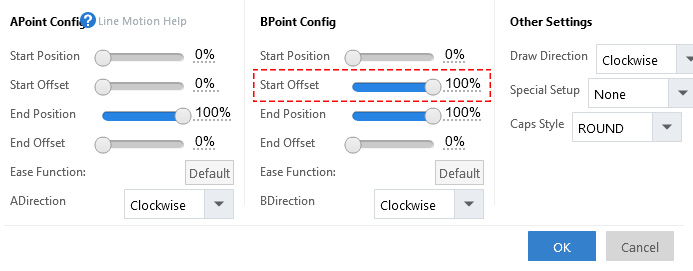
(2) Start Offset: refers to the distance between the actual position and the actual position where it is located. In other words, when you set the start offset means to delay starting animation effect. In addition, the larger the percentage, the longer the offset distance is. Let’s check the difference the start offset 10% and 100% (other parameters are consistent).
A Point Start Offset : 10% vs 100%
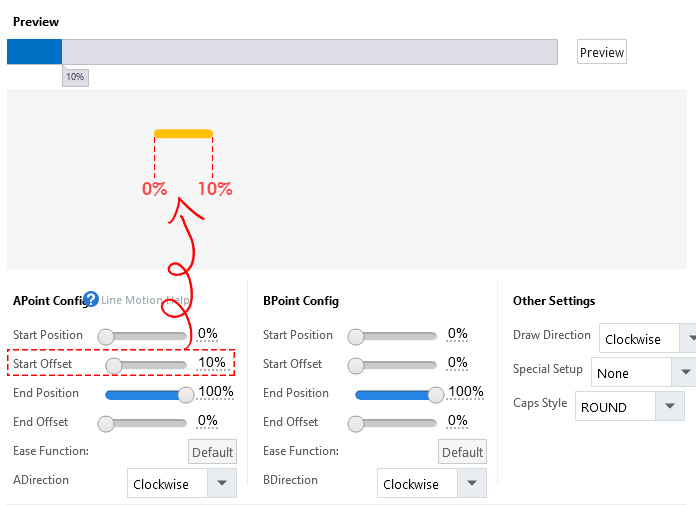

B Point Start Offset: 0% vs 100%
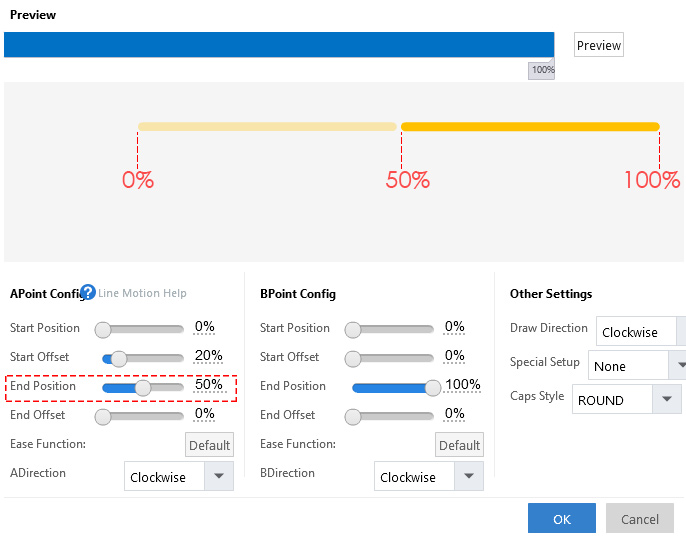
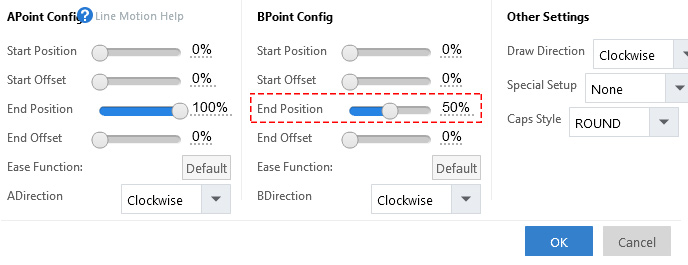
(3) End Position: refers to the position where the A/B point motion ends. 0% means the start, and 100% means the end of the line. Anyway, you can change the end position of the line by customizing the percentage of A/B start offset.
A Point End Position: 50% vs 100%
B Point End Position: 50% vs 100%
(4) End Offset: refers to the distance between the actual position and actual position where it is located. In other words, it is the position where the animation movement ends in advance.
A Point End Offset: set it as 20% means the A point stop moving when it is 20% from the end position. Let’s check the effect:
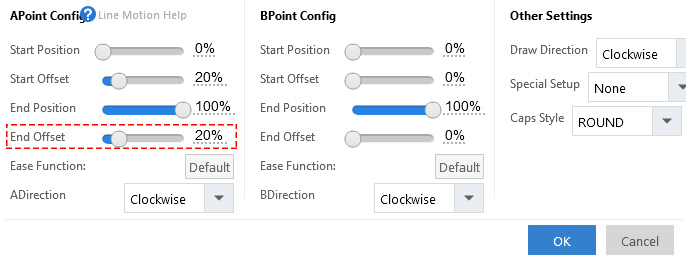
Because A point (20%) run faster than B point (0%), then it will show as follow.

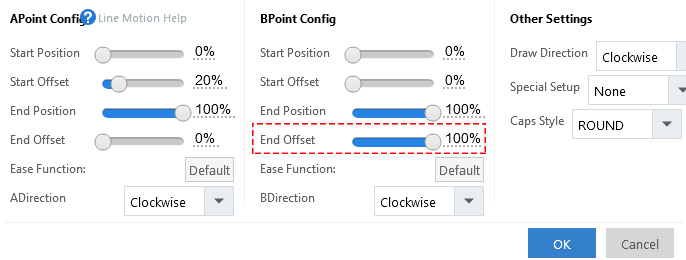
B Point End Offset: 20% vs 100%
(5) Ease Function: to make the dotted line animation more smooth and attractive. More information please goes: http://www.animiz.com/help-89.html
(6) A/B Direction: according to the demand to make the A/B point move in counterclockwise and clockwise direction. Here we take the rectangle for example.
Let’s continue to learn other settings: Draw Direction, Special Setup, Caps Style.
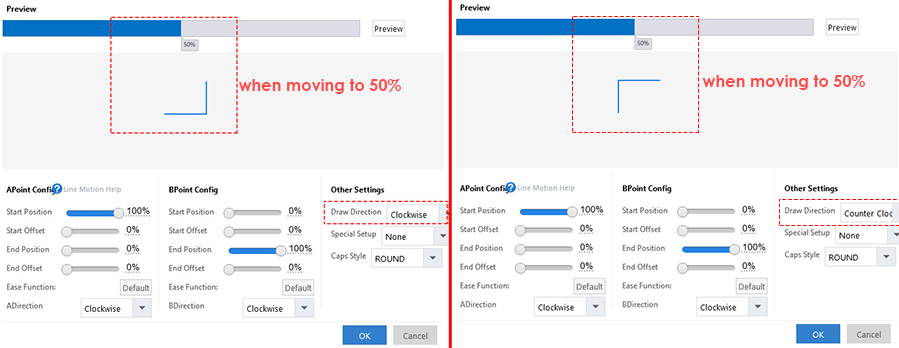
(1) Draw Direction: Drawing motion direction from 0% to 100% of dotted line animation. Check the effect as follow:
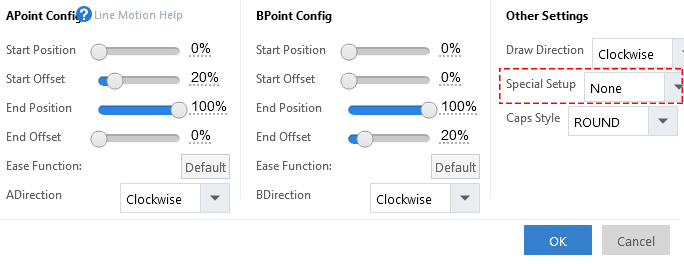
(2) Special Setup: There are three options, when A point moves faster than B, there may be an animation flashing issue. At this time, you can select [A Greater than B] to solve the problem of flashing animation. When the B point moves faster than A point, you can select [B Greater than A] to make the dotted line animation smooth.
When A point moves faster than B point (A point starts from 0%, B point starts from 20%), select the default option [none], the animation effect will be displayed as follow:
When B point moves faster than A point, the animation flash problem will also occur. Then you can select [B greater than A] to solve the flashing problem.

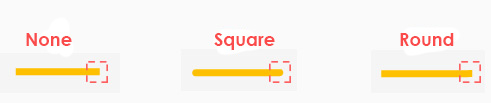
(3) Caps Style: Round, Square and None. Let’s check the difference.